Follow Me On Social Media!
Stained Glass Cookies: The Best Sweet Treat for Home Bakers
Introduction to Stained Glass Cookies
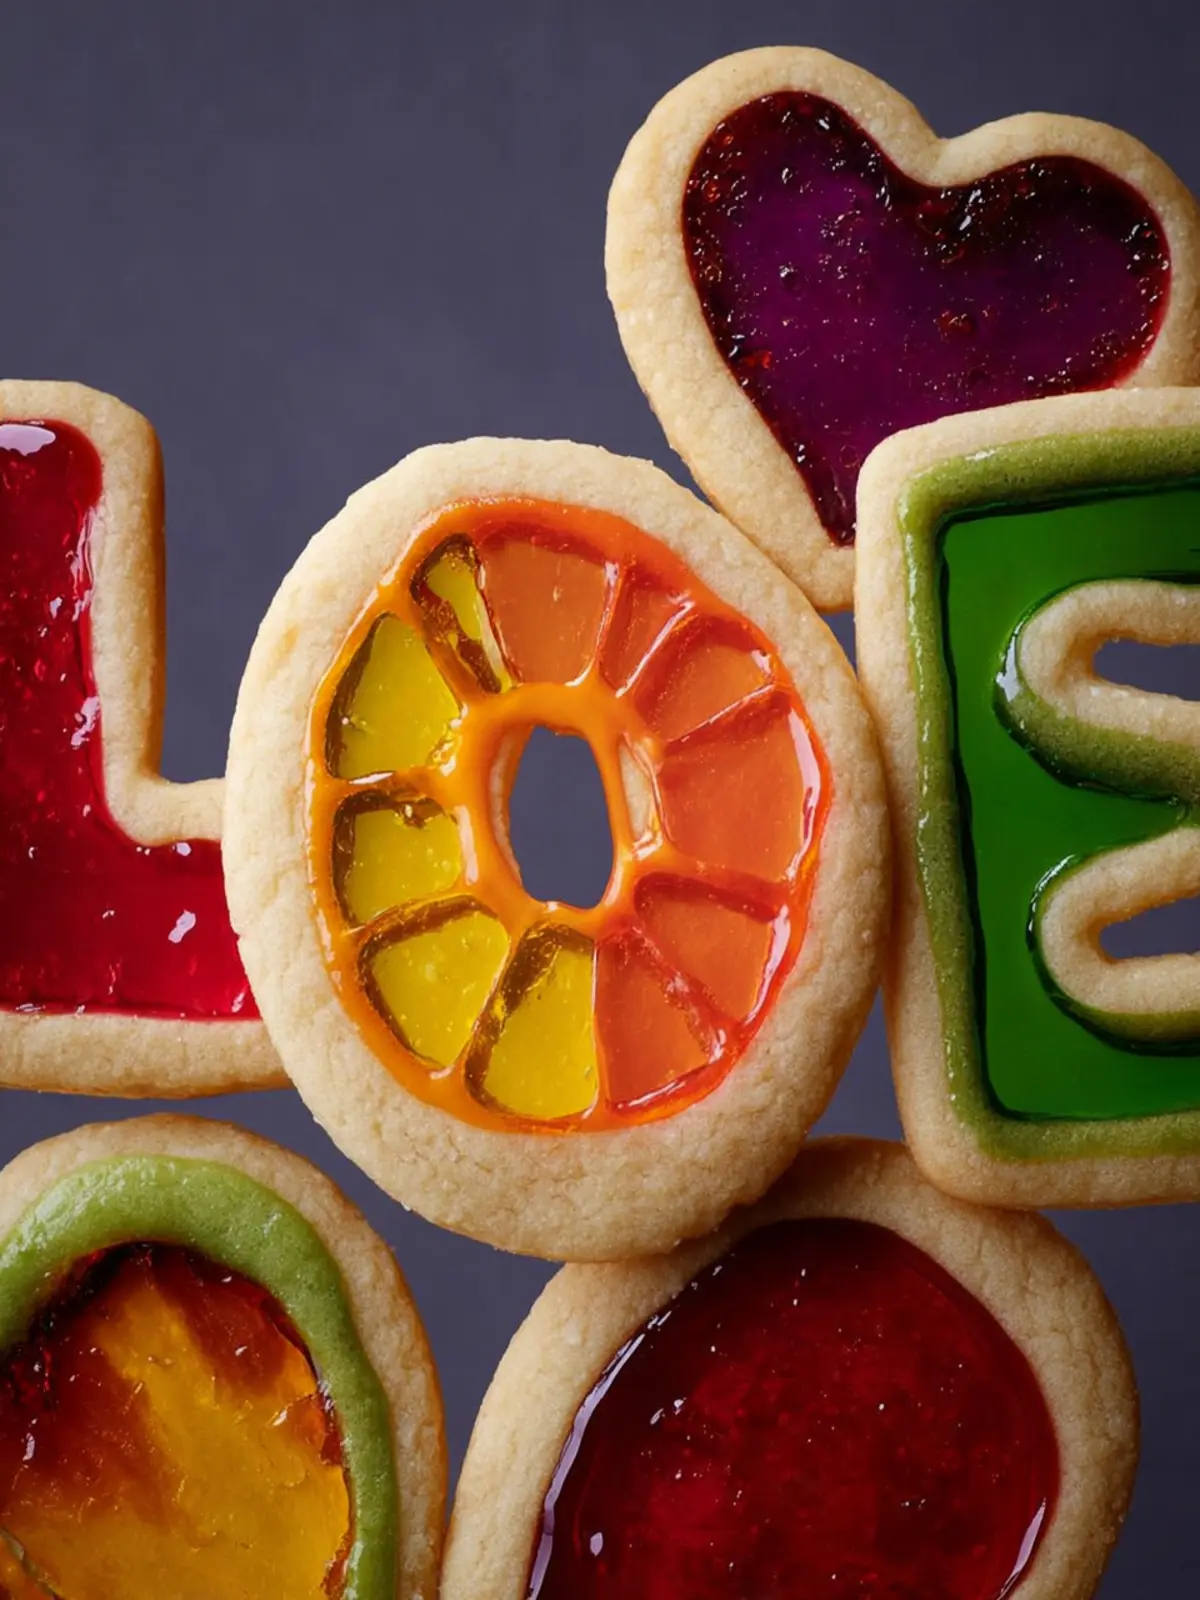
Stained glass cookies are more than just a delightful dessert; they are like tiny windows of sweetness that add a burst of color to any gathering. Imagine pulling a batch out of the oven, their vibrant candy centers sparkling like jewels in the sun—it’s hard not to marvel at these edible art pieces. The combination of buttery sugar cookie and melted hard candy creates a unique treat that is visually stunning and irresistibly delicious.
These cookies not only satisfy your sweet tooth but also engage your creative side. Whether you’re making them for holiday festivities, birthday parties, or just a cozy afternoon snack, stained glass cookies offer a way to impress your friends and family with minimal effort. Each cookie is a canvas waiting for your artistic touch, and decorating them can become a cherished tradition among friends or family.
What makes stained glass cookies a delightful treat?
One of the reasons stained glass cookies have gained popularity is their beautiful presentation. It’s astounding how a simple sugar cookie can transform into a work of art with just a sprinkle of crushed hard candies. The colorful centers glisten bright against the soft, buttery cookie, making them an eye-catching addition to any dessert platter.
Here are a few reasons to love these cookies even more:
-
Customization: You can choose any candy you like. Want a fruity flavor? Go for Jolly Ranchers or Lifesavers. Prefer something with a richer flavor? Try hard candy canes for a holiday twist.
-
Fun for All Ages: Baking these cookies can be a fun project for both kids and adults. Letting everyone choose their colors and flavors adds a personal touch and creates lasting memories.
-
Perfect for Any Occasion: With their festive colors and intricate designs, stained glass cookies are perfect for holidays, birthdays, or just a rainy day treat.
So, put on your apron and get ready—these cookies are sure to be a hit, brightening up your day just as much as they brighten up the table.
Key Ingredients for Stained Glass Cookies
Creating stained glass cookies is more than just a delightful baking experience; it’s like decorating your own masterpiece that you can eat! Each ingredient plays a role in crafting these delicious cookies that are not just visually stunning but also bursting with flavor.
-
Butter: Starting with butter, I prefer using unsalted for precise control over the saltiness of the cookie dough. It’s crucial for achieving that tender texture we love – soft but slightly crisp around the edges.
-
Sugar: Granulated sugar adds sweetness, while brown sugar contributes moisture and a hint of caramel flavor. Together, they provide the perfect balance that keeps the cookies chewy.
-
Flour: All-purpose flour forms the base of the cookie structure. For a gluten-free version, consider substituting it with a 1:1 gluten-free flour blend.
-
Eggs: Eggs are essential for binding the ingredients together. I recommend using large eggs for the best results in achieving a consistent texture.
-
Candy: The star of stained glass cookies! Coarsely crushed hard candies create the colorful windows. Opt for varied colors and flavors to make your cookies sparkle.
-
Vanilla Extract: Don’t forget the vanilla! It elevates the overall flavor profile, bringing warmth to each delightful bite.
When these ingredients come together, they transform into beautiful cookies that are sure to impress. Happy baking!
Why You’ll Love Stained Glass Cookies
Imagine decorating your holiday table with a dazzling array of stained glass cookies—their vibrant, jewel-like colors shimmering in the light, instantly bringing joy to both young and old alike. These whimsical treats not only satisfy your sweet tooth, but they also offer a fantastic opportunity for creativity and bonding time in the kitchen.
Visually Stunning
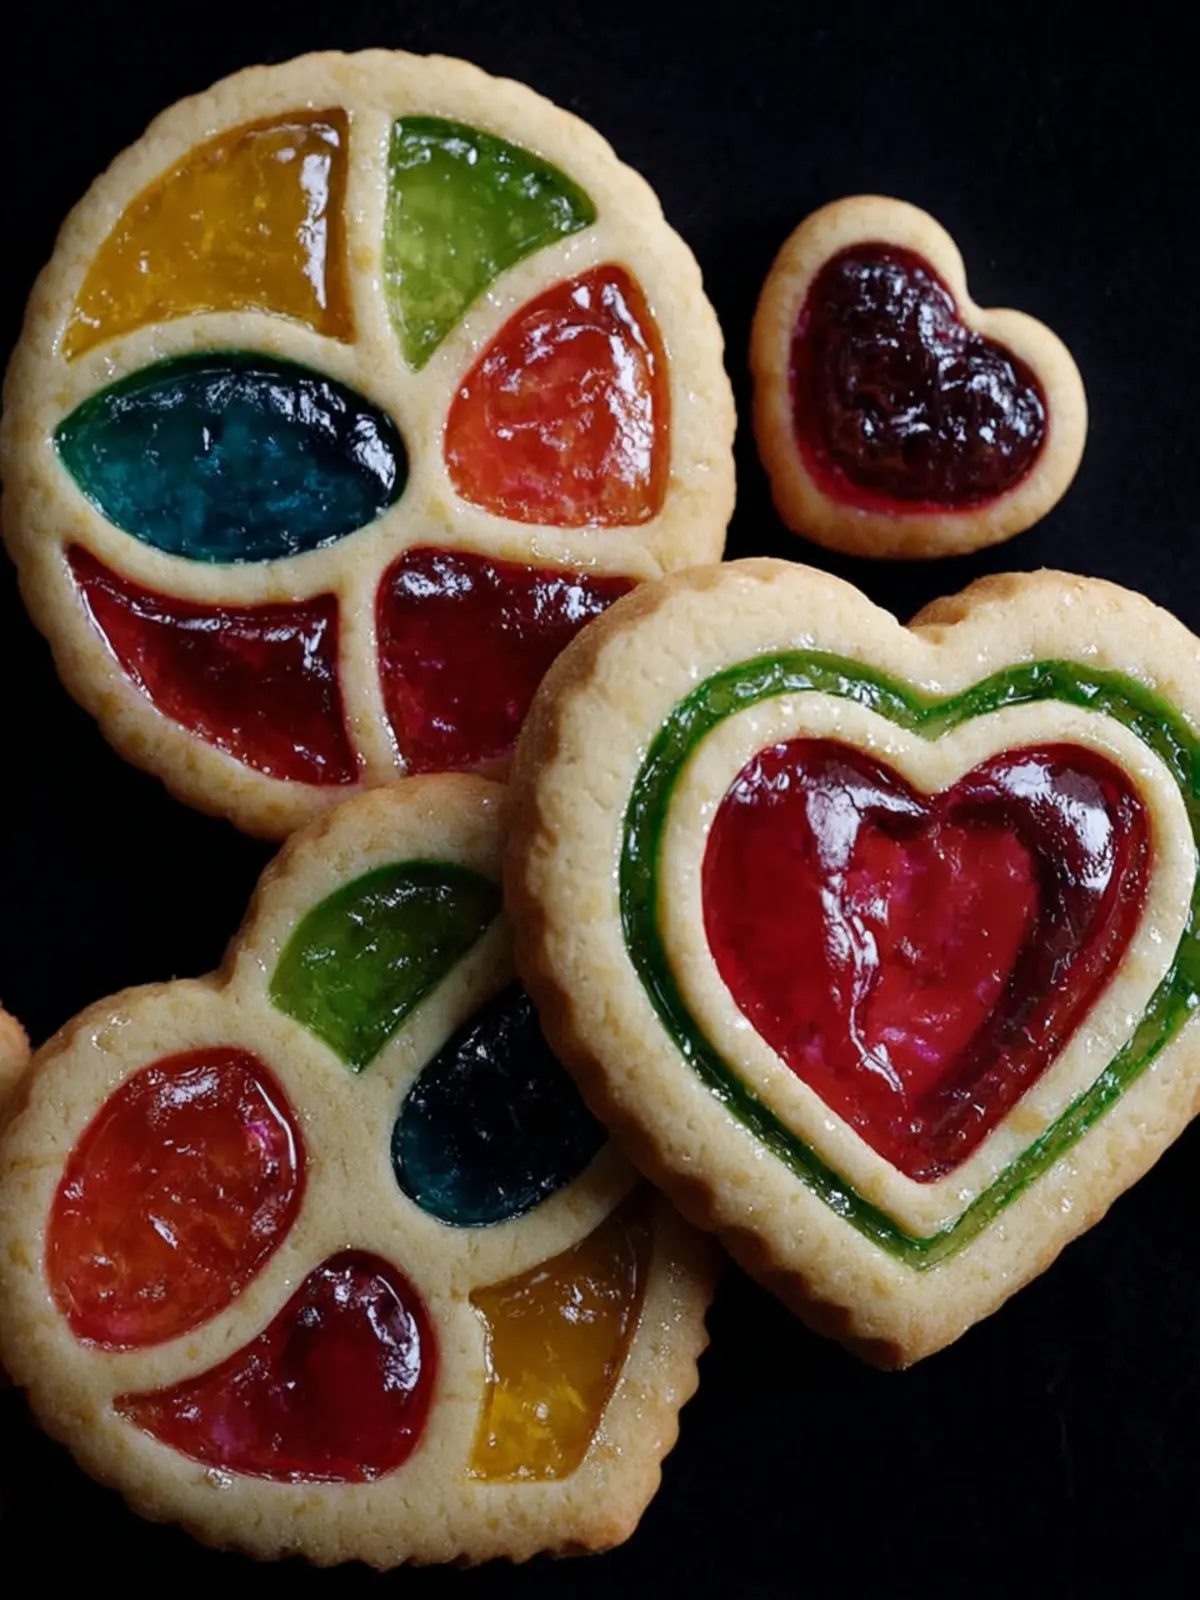
The beautiful, translucent centers of stained glass cookies create a visual feast that is hard to resist. When you pull them out of the oven, the melted candy shimmering like a piece of art will have everyone in awe. It’s the kind of treat that turns an ordinary day into an extraordinary occasion.
Simple to Make
Don’t worry if you’re a baking novice; these cookies are surprisingly easy to create! With a straightforward dough made from common ingredients and simple steps, you can chime along to holiday music while crafting these delightful cookies that are sure to impress.
Perfect for Any Occasion
Whether it’s a festive holiday gathering, a cheerful birthday party, or even a casual coffee catch-up with friends, stained glass cookies are versatile enough to fit in anywhere. Plus, you can customize them by using different colorful candies, accentuating your personal flair.
In the end, it’s about the joys of sharing these cookies, creating memories, and perhaps even starting a new culinary tradition with friends and family. Do yourself a favor and make some of these magical cookies; you won’t regret it!
Tips for Making Perfect Stained Glass Cookies
Creating stunning stained glass cookies can be a delightful experience, especially when you know a few key tips to enhance your baking. These visually enchanting treats can brighten any occasion, making them a favorite for gatherings and festive celebrations.
Choose Your Candy Wisely
The bright colors of your cookies come from hard candies that melt beautifully when baked. Clear candies like Jolly Ranchers or Life Savers work best to create that beautiful stained glass effect. Avoid using gummy candies, as they do not melt correctly and can ruin the desired look.
Chill Your Dough
Before you cut out shapes, chilling your cookie dough is essential. This step prevents your cookies from spreading too much during baking. Aim for at least 30 minutes in the fridge; this will not only maintain their shape but also develop deeper flavors as the ingredients meld together.
Perfect Timing is Key
To achieve that perfect balance between a soft center and crispy edges, keep an eye on the baking time. Typically, 10 to 12 minutes should do the trick—remove them when they are just starting to look golden around the edges. The cookies will continue to firm up on the baking sheet as they cool.
Make a Decorative Glaze
Adding a simple glaze can elevate the appearance of your stained glass cookies. A mixture of powdered sugar and milk can create a shiny finish. Drizzle it over the cooled cookies for an irresistibly sweet touch that complements the candy colors beautifully.
These simple tips can help you master stained glass cookies, making them a standout addition to your baking repertoire. Happy baking!
Time Details for Stained Glass Cookies
Creating stained glass cookies is not just about the final product; it’s a delightful journey that can fit perfectly into your busy schedule. Here’s a simple breakdown of the time you’ll need to craft these gorgeous treats.
Preparation time
To start, you’ll need about 30 minutes to gather and mix your ingredients. This includes rolling out the dough and cutting your shapes, so make sure you have everything ready to go!
Chilling time
Next, a quick 30-minute chill in the fridge is essential. Chilling the dough makes it easier to work with and helps maintain those lovely shapes during baking.
Baking time
When you’re ready to bake, allocate around 10-12 minutes for each batch. Keep an eye on them, as you’ll want a light, golden edge while the candy melts create that stained effect.
Total time
Overall, expect the entire process to take about 1 hour and 10 minutes from prep to baking. It’s a good way to spend an afternoon or to prepare for a festive gathering!

Nutritional Information for Stained Glass Cookies
When you indulge in stained glass cookies, you’re treating yourself to a delightful balance of flavors and vibrant colors. Understanding the nutritional breakdown can help you enjoy these beauties guilt-free.
Calories
A typical stained glass cookie contains approximately 120 calories. While they are a treat, being mindful of serving sizes can help you keep your calorie intake in check during the festive season or any occasion.
Protein
With about 2 grams of protein per cookie, stained glass cookies offer a modest boost. While they aren’t a significant source of protein, pairing them with a glass of milk can create a satisfying snack.
Sugar
Each cookie is sweetened with around 8 grams of sugar, making them a delightful indulgence. If you’re watching your sugar intake, consider savoring these cookies in moderation or trying a homemade recipe with alternative sweeteners.
FAQs about Stained Glass Cookies
Making stained glass cookies can be a delightful activity, and it’s understandable that you might have a few questions before getting started. Here’s a friendly guide to help you navigate some common concerns.
How can I prevent my cookies from spreading too much?
If you want your stained glass cookies to hold their shape beautifully, start with cold dough. Chilling the dough for at least 30 minutes before rolling it out can help prevent excessive spreading in the oven. Additionally, consider using parchment paper on your baking sheets; it can create a barrier that reduces how much the cookies spread.
Can I use different types of candy for the filling?
Absolutely! While traditional recipes often call for Jolly Ranchers or other hard candies, feel free to experiment with any colorful, hard candy you prefer. Just ensure they can melt well without burning. Some folks even enjoy using gummy candies for a chewier texture, but keep in mind that they may not create the same beautiful stained glass effect when baked.
How do I store stained glass cookies?
To keep your stained glass cookies fresh and vibrant, store them in an airtight container at room temperature. If you’ll be enjoying them over several days, place parchment paper between layers of cookies to avoid sticking. For longer storage, they can be frozen for several months, just make sure they’re well-wrapped.
What makes stained glass cookies suitable for various occasions?
Stained glass cookies shine bright at any event—from holiday gatherings to birthday parties or seasonal celebrations. Their colorful, whimsical design instantly enhances any dessert spread, making them a favorite for both kids and adults alike. Plus, the fun of making them together can create lasting memories!
Conclusion on Stained Glass Cookies
In the world of baking, stained glass cookies hold a special charm that enchants both young and old alike. The vibrant, jewel-like centers make them a delightful addition to any celebration or just a fun treat at home. Whether it’s a cozy family gathering or a festive cookie swap, these cookies are sure to impress with their stunning appearance and delicious flavor.
As you experiment with different shapes and colors, remember that perfection isn’t the goal; joy and creativity in the kitchen are what matter. So grab your ingredients, invite a friend, and start creating your own batch of stained glass cookies that will leave everyone marveling at your culinary masterpiece.
Print
Stained Glass Window Cookies
- Total Time: 2 hours 40 minutes
- Yield: 24 cookies 1x
- Diet: Vegetarian
Description
A fun and festive cookie recipe that creates beautiful stained glass windows using crushed hard candy.
Ingredients
Scale
- 3 cups all-purpose flour
- 1 teaspoon cream of tartar
- 1 teaspoon salt
- 1 cup butter (room temperature)
- 1 cup sugar
- 2 large eggs
- 1 teaspoon vanilla extract
- 1/2 teaspoon almond extract
- 20–30 pieces crushed hard candy (Life Savers, Jolly Ranchers, or other hard candy)
Instructions
- In a medium-sized bowl, whisk together the flour, cream of tartar, and salt and set aside.
- Place room temperature butter and sugar in the bowl of a stand mixer and cream with the paddle attachment until light and fluffy—about 3 minutes.
- Slowly add the eggs, almond extract, and vanilla extract and mix again until combined.
- Add the flour mixture to the butter mixture and mix until combined. Scrape the bowl to make sure that all of the butter mixture has mixed in completely.
- Cover with plastic and chill in the fridge for about 2 hours (or overnight).
- Preheat oven to 325 degrees F.
- Sprinkle the counter and rolling pin lightly with flour. Roll the dough on your floured surface until it is about 1/4" thick.
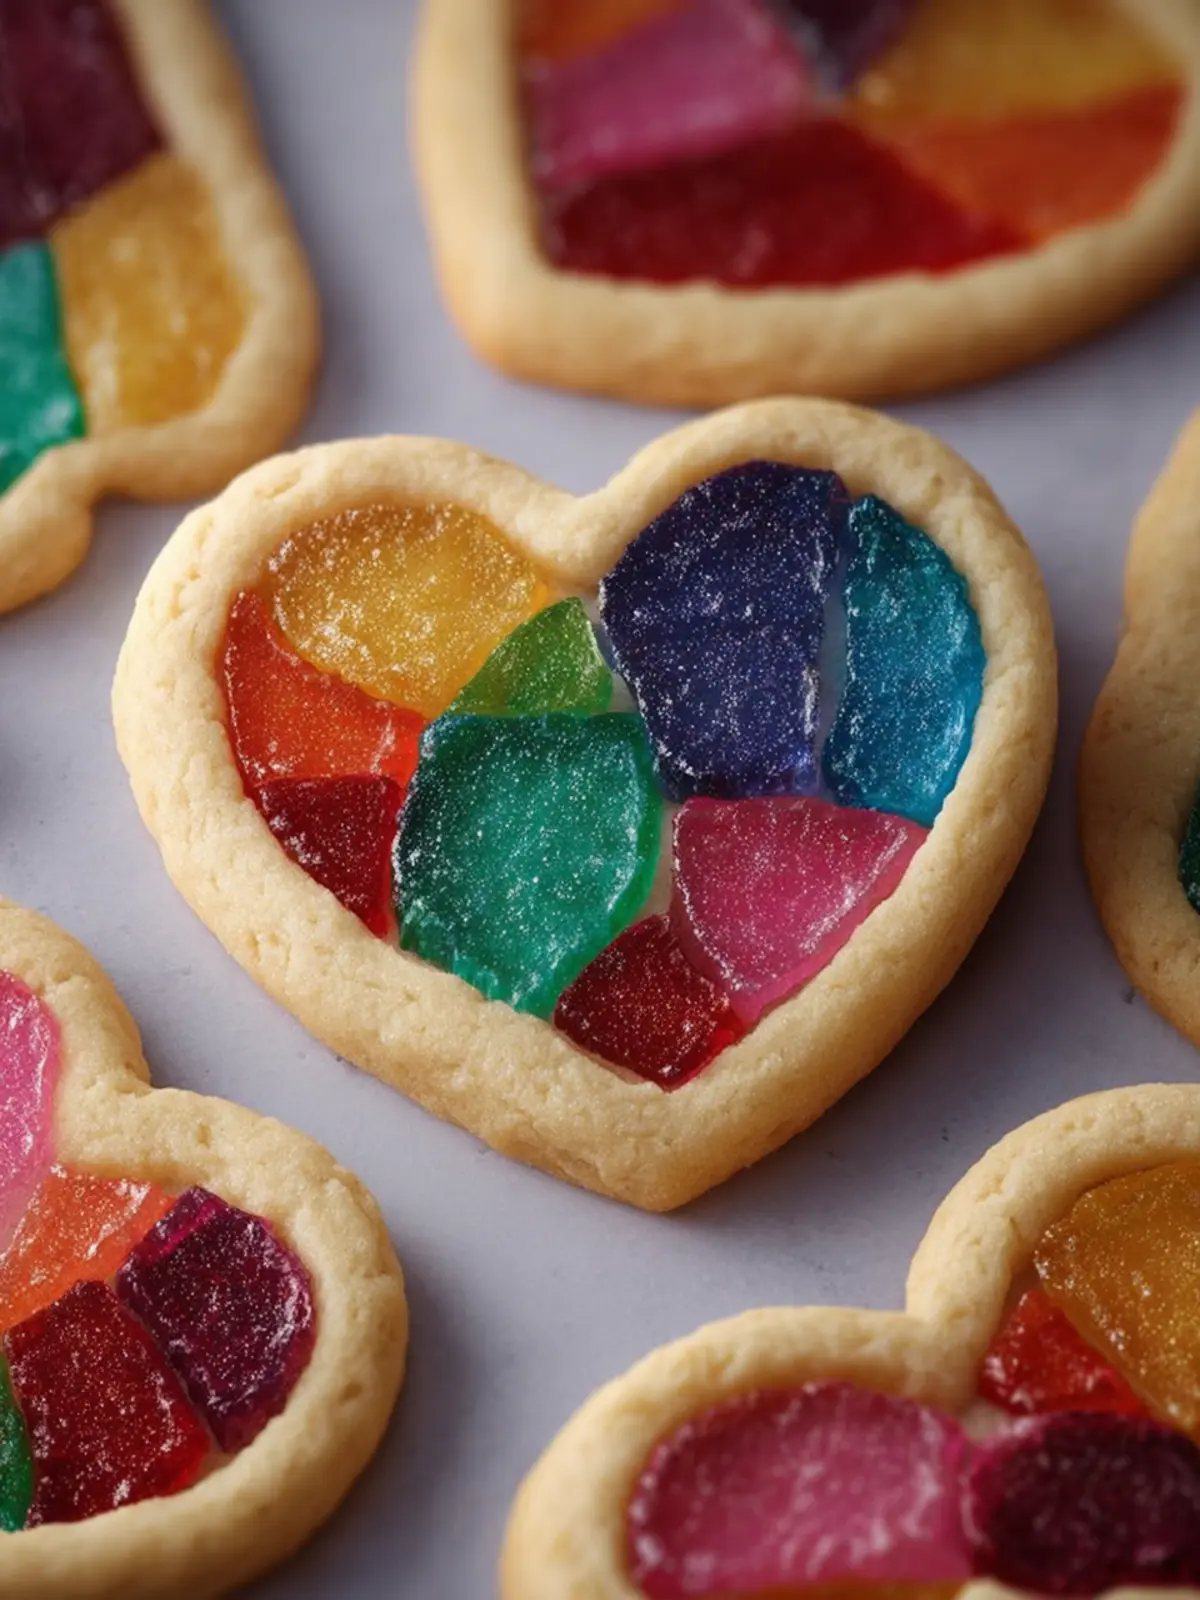
- Cut cookies out into desired shapes, then use a smaller cookie cutter to cut out small shapes inside each cookie to make a stained glass window. Place on a baking sheet lined with parchment paper at least 1" apart.
- Add the crushed candy and fill with as much candy as possible without overfilling the hole.
- Bake in a preheated 325 degree F oven for 8-10 minutes, or until the edges are set and there is just a hint of golden brown color.
- Let the cookies cool for about 2 minutes on the baking sheet before transferring them to a countertop to cool completely.
- Enjoy!
Notes
- For an extra colorful effect, use a variety of hard candies.
- Consider using a mix of flavors for the candy to add variety to your cookies.
- Chilling the dough is important for easier rolling and cutting.
- Prep Time: 30 minutes
- Cook Time: 10 minutes
- Category: Dessert
- Method: Baking
- Cuisine: American
Nutrition
- Serving Size: 1 cookie
- Calories: 120
- Sugar: 10g
- Sodium: 50mg
- Fat: 7g
- Saturated Fat: 4g
- Unsaturated Fat: 2g
- Trans Fat: 0g
- Carbohydrates: 15g
- Fiber: 0g
- Protein: 1g
- Cholesterol: 30mg